Your Genesys Blog Subscription has been confirmed!
Please add genesys@email.genesys.com to your safe sender list to ensure you receive the weekly blog notifications.
Subscribe to our free newsletter and get blog updates in your inbox
Don't Show This Again.

Competition is fierce; businesses around the globe want to provide the best personalised experience across a variety of voice and digital channels. But traditional approaches to customer engagement aren’t enough anymore.
Genesys Predictive Engagement gives you the insights and tools to engage with customers at key moments. You can provide them with the best resources and experiences at those moments, enabling your organisation to act when an action is required — not react after the moment has passed.
To further support your engagement strategies, Genesys Predictive Engagement enables third-party CRM integrations to automate workflows across their systems, including customer journey data and context. You can integrate with platforms like Salesforce, Marketo, Microsoft Dynamics and any third-party platform that facilitates Rest APIs, in conjunction with Predictive Engagement functionality to get a 360-degree view of the user.
The integration uses Genesys Cloud™ building blocks. To get started, you’ll need:
Let’s look at the use case of lead creation or campaign attribution with a Salesforce CRM system, for example, based on actions triggered by Genesys Predictive Engagement, and via script tab from a sales representative within the Genesys Cloud platform only.

There are several steps involved in tracking campaign-related web activity and creating leads with associated campaign attributes in Salesforce. To make it simple, here are three general configuration steps.
1. Prepare the Salesforce integration and data action.
First, you need to prepare your web campaign following UTM parameters. Then, create a dedicated user account with the appropriate rights to use the Salesforce data action integration, on behalf of Genesys Predictive Engagement. Finally, within Genesys Cloud, build the Salesforce integration and configure its data actions.
2. Use the Architect workflow to associate a lead.
Use a predefined workflow provided by Predictive Engagement and add the campaign ID directly to the workflow. Associate the data actions, publish the workflow and switch to Architect to prepare the workflow. Then import it and update the referential integrity constraints.
Next, go to Predictive Engagement and build an action map that uses the Architect flow action. Note: To create the new Salesforce lead with a richer set of journey data, you must override the default settings of these variables and tell Predictive Engagement where to obtain the user-specific values.
3. Creating scripts on Genesys Cloud.
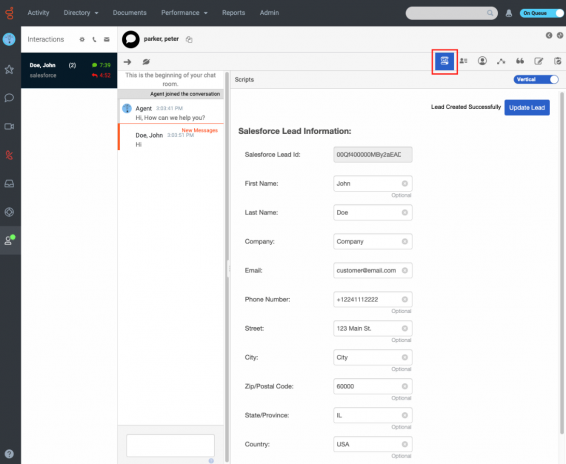
You’ll need to download both the script template and data actions that Predictive Engagement provides and set up the agent´s account. Once the script opens, the agent can see whether the user is an existing lead or not — and then can complete the form to create or update the lead as necessary.
Genesys Predictive Engagement uses artificial intelligence (AI) and machine learning to drive personalised experiences. It uses real-time and historical data to make informed decisions about how and when to engage website prospects.
Experience-based personalisation lets you improve sales conversions — without burning out your valuable sales teams. There are many possibilities for building a 360-degree view, and this third-party integration is a great step toward that north star value.
For more detailed step-by-step instruction, with additional video tutorials, go to the Salesforce lead creation and campaign attribution guide available in the Resource Centre.
Subscribe to our free newsletter and get the Genesys blog updates in your inbox.